TL;DR Thursday I caved and used parts from my personal stash to make a break-out board for the power supply. Sockets salvaged from the mother board and the floppy drive still serve as the inputs, though. I tried cutting out parts of a circuits board to appropriate but since I hadn’t realized our hacksaw had arrived, the results were… not great. A hard drive gave up it’s lid. Also I had help with the circuit board efforts, taking apart floppy drive and was taught a neat trick to make it easier to see small parts.
Next time (Saturday) I hope to have Tod’s Galileo board with me to see what it can do!
–
I pushed to make the power supply as usable as possible by the end of the day so Jen and I can use it Saturday.
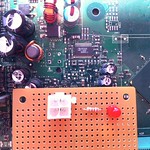
- First I desoldered the 12V power processor power socket from the motherboard and added it to a spare perfboard.
- Then I added a terminal block and wired the two together
–
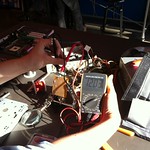
Checked to make sure connection the terminal block was solid by putting test probes against the terminals and got Houston, a TechXpert, to hold the camera for me.
–
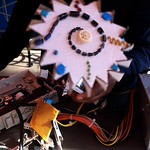
Wired up Barbs whirly-gig – Success!!! (Video at the top of the post)
–
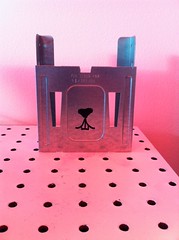
One more thing before going on to the stuff that didn’t work easily: hard drive with it’s top off spinning up and winding down. You might notice that the screws are back in their homes even though the top is off. We don’t have a lot of storage, so what better way to keep track of them?
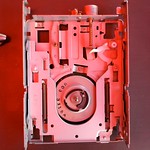
The next round was a bit more complicated. Venice local Rippley Sweetly was helpfully taking apart a floppy drive and had handed over the circuit board. Once I got the motors desoldered, I wanted to try carving out different parts of the board to use the sub circuits later. Sadly I didn’t see the sweet blue hacksaw in the cart because that would have made things very quick. No pictures for this part but a hobby saw, files (for scoring), pliers and finally the Dremel with a poor choice of bit were used by both Rippley and I to break out various sections of the floppy drive’s circuit board. After all that, I ended up desoldering the socket and hot-glued it to the perfboard after attaching lead wires (sorry still no pictures!). The motor contacts might still come in handy later, though. Next time circuit boards are carved I’ll take more pictures. The picture shown is of the disassembled floppy drive.
–

Neanderthal’s Magnifying Glass
Normally I wear my glasses when doing hardware hacking because it is easy to drop them down and hold a part close to my eye to read the small writing. I am wearing my contacts in the store because, you know, vanity. Rippley noticed me me struggling to read the part numbers off a transistor on the floppy drive’s board and showed me a trick. By making a small aperture with your thumb, index and middle fingers you have a low power magnifying glass that is with you always. My life is changed.
–
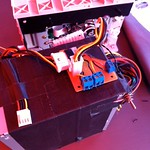
Finally, I quickly soldered up a switch and used gaffer’s tape to secure all the sockets to the top of the power supply so it isn’t just a nest of wires.
I still want to add an LED to the Powered Up signal wire, and add something other than the DVD drive to be the permanent load but this is great progress.
