carlynorama

the blog

Intel Experience Pop Up – Day 4 Recap

by Carlyn Maw on December 6, 2013, no comments

Rabbit!!!

Hareidolia (get it? hint – search term: pareidolia)

TL;DR Thursday I caved and used parts from my personal stash to make a break-out board for the power supply. Sockets salvaged from the mother board and the floppy drive still serve as the inputs, though. I tried cutting out parts of a circuits board to appropriate but since I hadn’t realized our hacksaw had arrived, the results were… not great. A hard drive gave up it’s lid. Also I had help with the circuit board efforts, taking apart floppy drive and was taught a neat trick to make it easier to see small parts.

Next time (Saturday) I hope to have Tod’s Galileo board with me to see what it can do! 

I pushed to make the power supply as usable as possible by the end of the day so Jen and I can use it Saturday.

removed from mother board, added to perfboard

12V proccessor power socket, removed from motherboard and added to the perfboard

  • First I desoldered the 12V power processor power socket from the motherboard and added it to a spare perfboard.
  • Then I added a terminal block and wired the two together

12V from screw terminals

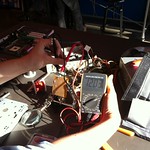
Using multimeter to check to power to terminal block.

Checked to make sure connection the terminal block was solid by  putting test probes against the terminals and got Houston, a TechXpert, to hold the camera for me.

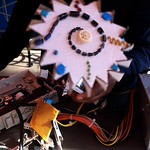
Barb's Spinner in Motion

Barb’s spinner attached to the power supply via the new terminal block

Wired up Barbs whirly-gig – Success!!! (Video at the top of the post)

One more thing before going on to the stuff that didn’t work easily: hard drive with it’s top off spinning up and winding down. You might notice that the screws are back in their homes even though the top is off. We don’t have a lot of storage, so what better way to keep track of them?

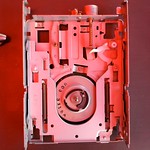
Ripply's Floppy Drice Dismantle

Stripped floppy drives with motors still in place.

The next round was a bit more complicated. Venice local Rippley Sweetly was helpfully taking apart a floppy drive and had handed over the circuit board. Once I got the motors desoldered, I wanted to try carving out different parts of the board to use the sub circuits later. Sadly I didn’t see the sweet blue hacksaw in the cart because that would have made things very quick. No pictures for this part but a hobby saw, files (for scoring), pliers and finally the Dremel with a poor choice of bit were used by both Rippley and I to break out various sections of the floppy drive’s circuit board. After all that, I ended up desoldering the socket and hot-glued it to the perfboard after attaching lead wires (sorry still no pictures!). The motor contacts might still come in handy later, though. Next time circuit boards are carved I’ll take more pictures. The picture shown is of the disassembled floppy drive.

Neanderthal's Magnifying Glass

Neanderthal’s Magnifying Glass

Normally I wear my glasses when doing hardware hacking because it is easy to drop them down and hold a part close to my eye to read the small writing.  I am wearing my contacts in the store because, you know, vanity. Rippley noticed me me struggling to read the part numbers off a transistor on the floppy drive’s board and showed me a trick.  By making a small aperture with your thumb, index and middle fingers you have a low power magnifying glass that is with you always. My life is changed.

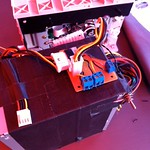
Everything all mounted on the power supply

Lot’s of gaffer’s tape holding different output connectors as well as a switch.

Finally, I quickly soldered up a switch and used gaffer’s tape to secure all the sockets to the top of the power supply so it isn’t just a nest of wires.

I still want to add an LED to the Powered Up signal wire, and add something other than the DVD drive to be the permanent load but this is great progress.

Intel Experience Pop Up – Day 3 Recap

by Carlyn Maw on December 4, 2013, no comments

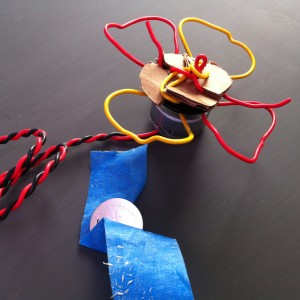
Red and yellow wires form a flower mounted to a small motor

Wire and cardboard flower mounted on a motor salvaged from a DVD drive.

TLDR: Monday I turned the motor I salvaged Saturday into a spinning flower.  I added a dubious choice of cable to be the power cord for my motors-on-a-box project.  I checked to make sure the ATX power supply worked and used it to drive the motors in a half disassembled DVD drive.  

Next time I hope to have a better sense if pilfered composite jacks really are the way to go for the pirate power supply and/or if I should just cut the connectors off.  I am planning on stripping down the DVD drive and add bits of it to the box.

Monday I moved a little slower with a bit more puzzlement about what to do next. It was handy to be able to show off Barb’s glue-stick vibrobot, Horatio our mascot, and the other sundry done-ish projects while I did some less flashy work on the power supply.

Tutorials on how to convert ATX computer power supplies into benchtop power supplies litter the internet:

I’m struggling with how reusable I want this supply to be or if it should just be dedicated to the boxes & motors project. That is something I should check in with Barb and Jen about. Are they excited to have it as a resources for us all or am I just sort of entertaining myself? Also, all of the listed instruction sets involve buying parts but I’d like to keep our salvage-only as a design exercise. We’ll see.

Desolder jackAdding 22 AWG solidcore wire leads to RCA cableAdding 22 AWG solidcore wire leads to RCA cableAdding "power cord" to projectProject to date5V standby is alive
Power on wire is alive (Green)Green wire shorted to ground, 12V goes livePeripheral cable now works, tooTray removedMessing around with optical drive motorsTrying to figure out CD tray (sawed in half)
Spinning bowtie?Went ahead and made a flowerBattery powered wire flowerSpinning flowerSecured soldering ironCharging station and future project storage
The night night drawer

Things I did today:

  1. Desoldered composite input jack from VCR board with the idea that I’ll be using them somehow for the supply.
  2. Soldered solid-core wire onto the composite cable just incase I’ll want to plug it onto a breadboard.
  3. Tested the supply by checking both the “Stand-by” wire and the “Power-on” wire to make sure they read 5 V ( the purple wire and the green wire respectively ).
  4. Shorted the Power-on wire to ground to activate all the other power pins. (* I had a DVD drive as a load to prevent burning out the supply. )
  5. Checked one of the 12V wires on the 20 pin connector to make sure shorting the wire worked.
  6. Played with mentioned  CD/DVD drive attached to the 4 pin Molex connector.
  7. Semi-dismantled drive and played with the eject button and disk tray gears to get ideas about what to do next.
  8. Moved on and made a pretty flower.

Tools & Supplies used

  • Goes without saying: wire, wire strippers, pliers, snips and various screwdriver tips from the iFixit kit.
  • Heat gun to desolder jack
  • Soldering iron to attach wires
  • Electrical tape to seal up the soldered wires
  • Drill and 1/4 inch drill bit to make hole for wire
  • Hot Glue to stabilize wire lead out of the side of the box and wires on back of the DVD motor soldered Saturday and made into a flower today
  • Multimeter & aligator clips to check power coming from ATX supply

Intel Experience Pop Up – Day 2 Recap

by Carlyn Maw on December 1, 2013, no comments

Pictures of gears and motors harchly lit

The assembly disassembled.

TLDR: Saturday I rewired the DPDT circuits, soldered and broke lead wires, programmed an Arduino, wired up a transistor and desoldered a colorful array of resistors from a circuit board.  (In pictures and short videos). Next time I plan to either mount more motors to the box or set up an H-Bridge. Also I’ll be turning a computer power supply into a bench-top source so we don’t eat through batteries.

Some fails and some wins yesterday. And lots and lots of heat.  Friday had been a cloudy day and it had been very pleasant to work in the front window. Yesterday the heat was raging and it made pictures very contrasty. I held up a circuit board as a scrim when I had enough hands free to do it.  Note to self… fill up your water bottle!

But about the projects. My first thought had been to tackle this one motor assembly that I had been putting off working on because it had very short lead wires on the motor.  It had come to me as a result of CRASH Space’s involvement with STAR Education’s 2nd annual Light’s on After School S.T.E.A.M. Nation event where we ran the Take Apart table. It had been an orgy of dismantling, with the parts being extracted with more joy than care. Which is how it should have been, of course.  It was a blast.  That is however how you end up with short lead wire to work with.

Tiny lead wires on a motor mounted to a metal frame

Tiny tiny lead wires on a motor salvaged from a Take Apart event for Children.

The good news! I made perfect solder joints! YAY! The bad news I didn’t take a picture before I ended up ripping them off twisting the wires with the drill.  I hadn’t gotten both lead wire secure into the jaws of the drill so the black wire flew out and the force broke both of the connections leaving even tinyier stubs.

Motor in motion, taped to a battery.

Motor removed from DVD drive assembly and soldered to wires. Shown in motion, taped to a battery.

Here second motor from the assembly and soldered wires to it so at least we have one motor to work with. And hey, it runs off of a CR2032 battery.

I was bummed that I didn’t have a second assembly to add to box that showed a different way to gear a DVD drive.

Wires from a switch in a breadboard

New wiring for the DPDT motor changes it to control the forward and back of both motors.

Moving on I changed the wiring on DPDT switch to turn both motors on together, but switch their directions (link to video).

Colorful resistors salvaged from a VCR Board shown on a breadboard.

Colorful resistors salvaged from a VCR Board.

The motor without gears and the black disk is for spinning the CD. It spins very fast. Throws pipe cleaners mounted to it across the room fast. My first thought about how to slow it down was to steal some of the beefier resistors from the VCR circuit board we have to limit it’s current draw and the voltage it was receiving. All of them proved to be too much resistance.  (Note to self – check how they or the lower wattage ones will behave in parallel next time )

PWM via a transistor, LED standing in for motor

PWM via a transistor, LED standing in for motor

Using a transistor and PWM from an Arduino board seemed like the next option to try.  There are a lot write ups on how to do that but the Interactive Telecommunications Program’s Lab Assignment for controlling high current loads breaks it down well.  If you are new to electronics and Arduino going through ITP’s tutorials is one of the free (except for parts) methods to get started.

Arduino code uses an expression called analogWrite() to change the intensity of the power it is supplying.  A value between 0 and 255 determines what percentage of time the pin is on.  For those of you who are curious, a value of 75 was the lowest value I used that could get them motor past it’s starting inertia consistently.

Thanks about all I have time to write for today. Make sure to check out the full set of pictures on flickr. I’ll add more captions and information as I get time.

Intel Experience Pop Up – Day 1 Recap

by Carlyn Maw on November 30, 2013, no comments

What I made on "Blue Friday"

What I made on “Blue Friday”

So this winter I am spending a couple of days a week taking things apart and making new objects from the pieces at the Intel Experience store.  From those of you who follow me at the CRASH Space blog, you know how perfect this is. I heard about the gig through Maker Ed because they posted it on our discussion forum.   Maker Ed is an educational outreach foundation brought to you by the folks at Maker Media of Maker Faire and Make magazine fame.   Intel is one of the founding sponsors of Maker Ed and wanted there to be some interesting, educational and fun tinkering going on as part of the venue.  It sort of fits perfectly, this splitting eWaste open for all to see the guts. #IntelInside, afterall!

The report so far: I loved the first day.   It was pretty mellow. Rainy days on Abbot Kinney have mostly people who are out because they are on a mission. Among the folks who stopped by were a teacher who wants to be a Welder (sent her to Molten Metal Works), and finance guy who was interested in seeing the inside of stuff he funds, kids who were super excited to play with PacMan set up to work with the MakeyMakey. No one has had time to get hands on with me yet, but hopefully that will change today since there is not a cloud in the Southern California sky this morning.

The first thing I did is strew out all the eWaste I had brought with me to seed the pile. VCRs, optical drives and printers are my favorite things to take apart. Really anything with motors and gearing. I am not a mechanical engineer so everything I’ve learned about how to make things spin and move has been by look at other people’s work.

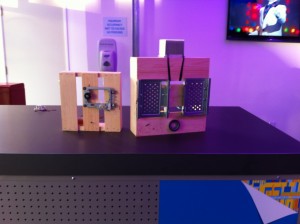
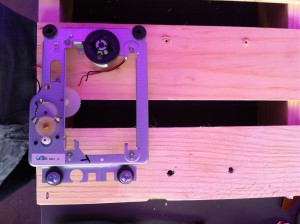
I picked up a frame from a DVD drive and mounted it to small wooden crate they let me pilfer from the break room.

Motor carriage resting on box with holes drilled for mounting.

Holes drilled in crate before mounting motor carriage.

Tools & Supplies Used:

  • Drill
  • Medium sized drill bit, small drill bit
  • 2 bolts, 4 nuts
  • 2 screws


The next step was to wire it all up

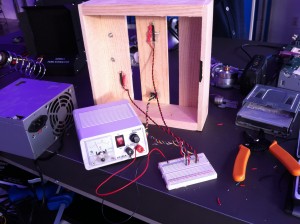
Motors attached to power supply via switch

A variable power supply connected to two motors via a DPDT switch.

Tools & Supplies Used:

  • Soldering Iron
  • Solder
  • 6 colors of wire
  • DPDT swtich
  • Heat shrink
  • Hot glue
  • Breadboard
  • Drill (to spin wires up all pretty)
  • Variable power supply

It works! Check out the Flickr set to see the video and schematic.  Later today I’m going to change the wiring so both motors are on and the motors switch between going forward and back.


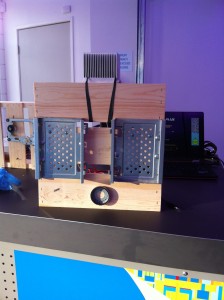
Spare parts attached to crate.

Spare parts attached to crate, alligator clips behind attach to Makey Makey

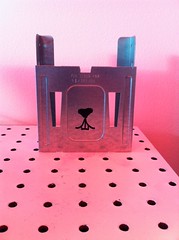
Also, I updated the Makey Makey set up to be a bit more sturdy. I am using ewaste parts because I forgot to pick up some produce or plants. The nice thing is that it doubles as a face and is fully reversible if we want to use the parts or crate for something else.

Tools & Supplies used:

  • Shielding from computer break down
  • Magnet from motor in VCR
  • Heat sink
  • Gaffer’s Tape
  • Various screws


97 year old pixel artist Hal Lasko

by Carlyn Maw on July 26, 2013, no comments

via Jezebel

From Vimeo Description

Meet 97-year-old Hal Lasko.
Better known as Grandpa, he spent his entire working life as a graphic artist, back when everything was done by hand.
When he retired his family showed him the computer. He didn’t find much use for it until he discovered Microsoft Paint. He ws hooked. Since then, Grandpa spends ten hours a day placing pixels around his computer paintings. His work is like a collision of pointillism and 8-Bit art.

Hal Lasko

Check your Java on OSX if you care…

by Carlyn Maw on August 30, 2012, no comments

For those of you who care about such things, there is a potential exploit for Java 7 (1.7) which I tragically found out about on Slate about a week later than I really ought to have had.

Doh.

That said, as a mac user who is squirly about installing the latest Java, I was pretty sure I hadn’t updated yet.

How does one know for sure? Open terminal, type “java -version” and the version you are using will spit out.

If you want to change that version – well goodnight and good luck. Here is an article that is a very good summary about concerns on different ways of swtiching your Java version

3D Printing Day 8: Picking a Software, Wings3D

by Carlyn Maw on April 17, 2012, no comments

TL;DR

I’m really glad I went back and tried Wings3D. It is an OpenSource GUI based modeler that is relatively easy to use and intuitive. Documentation is lacking, but there is enough to get started and stay interested.  Wings3D also supports the most input and output formats of all the software tested. 

3D Model as a .wings file and STL file


Other People’s Videos

The documentation is pretty thin. I did find an old version of the documentation, but mostly I hunted on YouTube.

Start with this one

Wings3d basics – User Interface

Watch with the sound off

3D Modeling – Part I: Navigation in Wings 3D

3D Modeling – Part II: Deformation in Wings 3D

3D Modeling – Part III: Deformation in Wings 3D (Cont.)

Others

Wings 3D demo: Round Hole in Rectangular Solid

Start of a Christmas Tree demo


Mine


Keyboard shortcuts I don’t want to forget

R to return camera to home view

X,Y,Z to snap camera to a dead on view of that axis

G – to select an Edge Ring once a edge is selected –  (Then C to create Edge Loop at the center of the ring)

L – The Edge Loop Select once a vert or edge is selected that is part of a loop

TAB – access numeric editing

5 – toggle from % numeric edit to direct units edit


The Stats

Version 1.4.1
Date 4/13/2012

Target Demographic
  • Ideal Object – Wide variety
  • Ideal User – Intermediate computer user

Access
  • OpenSource – Yes
  • Free – Yes
  • Premium Version – No
  • Linux Version – Yes
  • Browser Based – No
  • Requires Internet Acces – No

Privacy, Community & Learning
  • StalkerWare – No
  • Private Files – Yes 
  • Official Community Repository – No where I found (Other than Thingiverse)
  • Instashare – No
  • Collaborative Editing: No
  • Official Tutorials – None 
  • Community Tutorials – Okay, not as many as Blender or SketchUp

Editing
  • How many tutorials/videos to build first project – looked at 6+ examples, about 10 minutes apiece. 
  • Default Bkg Color – gray, different themes available
  • Good for Computer Beginners – Maybe
  • Requires 3 Button Mouse – Yes, although there is preference 
  • Real-world units – No
  • Numeric controls – Yes
  • WYSIWYG – Yes
  • Scripting – No
  • Plugins & Extensions – If you know Erlang you can write a plugin

Input
  • Format Types: NDO, 3DS, AI, EPS, PS, LWO, LXO, OBJ, STL, SVG
Output
  • Direct to STL – YES
  • Format Types: NDO, 3DS, BZW, DAE, EPS, XML, LWO, LXO, OBJ, POV, RWX, STL, WRL, X
  • Adjust scale on output – Not for STL, other unknown
  • Direct to Printing Service – No


3D Printing Day 7: Picking a Software, OpenJsCad

by Carlyn Maw on April 16, 2012, no comments

TL; DR

OpenJsCad is another entry in the “model as programing problem” category. OpenJsCad has more flexibility than OpenSCAD but is currently way less pleasant to use.  OpenJsCad embraces dynamic variables. Even the shapes are variables. OpenSCAD has variables that behave more like glorified constants.  OpenJsCad entered the arena more recently (January 2012) and needs to resolve some interface problems. So while I think in the long run OpenJsCad might prove to be more powerful I didn’t enjoy using it as much.

OpenJsCad is the only software I’ve tried that bridges both worlds in terms of where you interact with it. If installing software locally is not an option, that’s okay – just go to the OpenJsCad home page and use it there. If you want to work offline, downloading the code is an option.

I’m not clear on why but the code does not live in the master branch on github. To get the actual source I had to go the the gh-pages branch and download the zip (rather than just clone the repository). After the unpacking the archive file I pointed Chrome to the index.html file included and everything worked perfectly.  Not quite as brain-dead easy as downloading an executable, but it would be possible to create models while lounging on a beautiful deserted island.

I didn’t read anything that wasn’t either on or linked to the OpenJsCad project front page and still managed to do my model in under an hour. Having already logically plotted things out using OpenSCAD may have helped, but OpenJsCad uses pretty standard conventions that will be comfortable to JavaScripters.

I did all my actual typing in BBEdit since the code window is small and “below the fold” when working on a laptop. I did not like that I couldn’t see the code, model and status messages all at the same time.

https://gist.github.com/2380346


The Stats


Version ?
Date4/13/2012


Target Demographic
  • Ideal Object – Algorithmicly generatived objets
  • Ideal User – Programer/Programaticaly inclined, intermediate


Access
  • OpenSource – Yes
  • Free– Yes
  • Premium Version – No
  • Linux Version – N/A
  • Browser Based – Yes
  • Requires Internet Acces – No, if installed locally


Privacy, Community & Learning
  • StalkerWare – No
  • Private Files – Yes
  • Official Community Repository – No where I found (Other than Thingiverse)
  • Instashare – No
  • Collaborative Editing: Nothing built in, but whatever works for code will work for OpenJsCad
  • Official Tutorials – Examples provided
  • Community Tutorials – Didn’t not find a ton, didn’t look very hard


Editing
  • How many tutorials/videos to build first project – looked at 3 examples
  • Default Bkg Color – white
  • Good for Computer Beginners – Maybe
  • Requires 3 Button Mouse – No
  • Real-world units – No
  • Numeric controls – It’s ALL numeric…
  • WYSIWYG– Yes, but not directly editable, only a render of the code
  • Scripting – Yes (Duh)
  • Plugins & Extensions – The code is open source, I didn’t not notice plugins or libraries


Input
  • Format Types: None
Output
  • Direct to STL – YES
  • Format Types: STL
  • Adjust scale on output – No
  • Direct to Printing Service – No


3D Printing Day 5: Picking a Software, Blender

by Carlyn Maw on April 6, 2012, one comment

TL;DR  Blender has one of the steepest learning curves of any software I’ve tried to use in a long time. The climb is worth it for the computer savvy if the end goal is to produce a character model that can be used in animations and printed out as action figure. The competitors cost thousands of dollars. Making objects for the real world isn’t the problem Blender evolved to solve and it is… quirky… using it to do so. Tutorials can be hard to follow because expert users customize their layouts so much. 3 button mice are not my favorite being a hand switcher, and the software cannot be used without one. So while I don’t hate Blender, love that it is open source (C, C++, python) and get why it has a rabid fan base, learning it isn’t where I want to spend my time right now. But I made the model, and I’m actually PROUD. Took a lot of work to figure out.

Since there is no official place to share files for Blender I’ve put everything on GitHub

https://github.com/carlynorama/3DModeling-IntroPosts

Web Resources

Videos Watched (and recommended) 

Videos 1-3 Here (15 minutes total)  http://cgcookie.com/blender/get-started-with-blender/
Cyberpunk Telescope (43 minutes, I watched about half): http://wiki.blender.org/index.php/Doc:2.6/Manual 

Videos I’d Watch Next

My Notes

So I watched a bunch of videos – but I wish I had seen the ones on http://blendtuts.com earlier. I haven’t watched them all yet but I think they might have covered exactly what I needed to know. What was hard about the process for me is that all of the videos are for people who want to make objects that will only ever live on a screen. I did not see a lot of tutorials aimed at the 3D printing crowd. This has to be a searching problem on my end given the number of Blender built models on Thingiverse.

Commands I don’t want to forget:

MMB (middle mouse button) – Oribit
MMB + SHIFT – Pan
MMB + CNTRL – Zoom


OPT/ALT + RMB (right mouse button) to select edge rather than vertex
CNTRL + TAB to get menu to choose what gets selected by default (including faces)
CNTRL + Z Undo


E – Extrude
S – Scale
SHIFT Select at least 3 vertices and then F to create a face
A to toggle selections (All <-> None)

My Video


The Stats

Version 2.62
Date 4/4/12

Target Demographic
  • Ideal Object – Model for use in a 3D world, anything but tiny tiny if there are also things athat are BIG. 
  • Ideal User – Expert

Access
  • OpenSource – Yes
  • Free – Yes
  • Premium Version – No
  • Linux Version – Yes
  • Browser Based – No
  • Requires Internet Acces – No

Privacy, Community & Learning
  • StalkerWare – No
  • Private Files – Yes 
  • Official Community Repository – Nothing “official” it seems but plenty to choose from is you search for “blender repository”
  • Instashare – No
  • Collaborative Editing: No
  • Official Tutorials – Good, but not targeted at 3D printers
  • Community Tutorials – Terrible to Excellent. There are a lot of them. 

Editing
  • How many tutorials/videos to build first project – 2hr+ (Giver yourself a whole weekend if you really want to get comfortable. And keep using it regularly at first)
  • Default Bkg Color – Dark gray
  • Good for Computer Beginners – No
  • Requires 3 Button Mouse – Yes
  • Real-world units – Yes, users choice
  • Numeric controls – Yes
  • WYSIWYG – Yes
  • Scripting – Yes
  • Plugins & Extensions – Yes, many

Input
  • Format Types: DAE, BVN, SVG, PLY, STL, 3DS, OBJ, X3D, WRL

Output
  • Direct to STL – YES
  • Format Types: DAE PLY STL 3DS FBX OBJ X3D
  • Adjust scale on output – No, unitless unless units pre-indicated
  • Direct to Printing Service – No