TL;DR Just easy. Well, “just easy” after watching about 20-30 minutes of intro videos. Everything I wanted to be able to do, I could. With options comes complexity; I had to spend some time strategizing how to approach building the model since there were so many paths that would have worked. The plethora of YouTube videos helped. I would not plop a 6 year old down in front of Google SketchUp, but a computer user who has some familiarity with graphics packages shouldn’t have a problem. Oh, and it is a real downloaded software with which I can make files that live only my computer. Didn’t even need a login. And it’s free. They get-ya in the free version by making the import and export options incredibly lousy. But another plus is the scripting language, so there is a plugin for that.
- http://sketchup.google.com/training/videos.html
- http://sketchup.google.com/training/videos/new_to_gsu.html (I watched 1, 2, 3 and half of 4)
- http://sitescontent.google.com/google-sketchup-for-educators/Home
I watched quite a few other videos trying to glean how advanced users problem solve in SketchUp. I really thought I was going to end up using the FollowMe tool – if only because of its awesome name. As part of that investigation I watched a FollowMe Tool tutorial, How to make a Doughnut Helix, and one about Cuerpos de revolución. (Yes it is in Spanish. Apparently by a guy who used to do a little Parkour. I love the internet.)
In the end, the Offset tool and the Push/Pull tool took care of business.
My Video
Since I was able to make the shape so freaking quickly after watching the videos, I decided to make my first screen cast using a built in feature of QuickTime (Took me 25 tires in the end. Think creating a voicemail outgoing message, but 100 times worse.)
The Steps:
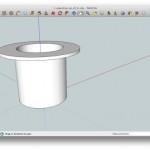
- Draw circle with a 27.5 radius
- Pull it up to 55 mm high
- Offset by 2.5 mm
- Pull the offset down 52 mm (measure)
- Select the inner bottom edge of the cup with the offset tool, pull it in 22 mm to leave a 6 mm circle
- Push the hole down 3mm EXACTLY
- Select top outer rim with the Offset tool and pull it out 15mm
- Pull both parts of the face up 3 mm
- Delete extra circle on the top face
- Ideal Object – A building, an chair, a bracelet, whatever.
- Ideal User – Medium level computer user to expert
- OpenSource – No
- Free– Yes
- Premium Version – Yes ($495.00, includes Layout – a presentation software, “Why Go Pro“)
- Linux Version – Nothing native, version 8 works with Wine in Windows XP mode (reported on the Ubuntu Forum)
- Browser Based – No
- Requires Internet Acces – only to link to 3D Warehouse or get plugins
- StalkerWare – No
- Private Files – Yes
- Official Community Repository – Yes, Google 3D Warehouse
- Instashare – From the warehouse, Google Buzz/Reader/Blogger/+, Facebook, Twitter, Digg, Delicious, MySpace, and various embed codes. Even for a 3D model version.
- Collaborative Editing: Yes, via the warehouse
- Official Tutorials – Great.
- Community Tutorials – Terrible to Excellent. There are a lot of them.
- How many tutorials/videos to build first project – About 30 minutes worth
- Default Bkg Color – Gray! (But you get to choose)
- Good for Computer Beginners – Only if they are dedicated
- Requires 3 Button Mouse – No, but can be helpful
- Real-world units – Yes, users choice
- Numeric controls – Yes
- WYSIWYG– Yes
- Scripting – Yes Ruby Script
- Plugins & Extensions – Yes, many
- Rasters – Free: as flat uneditable things, yes. Pro and plugins might have more tools
- 2D Vector – No. Pro and plugins might have more tools
- Other 3D files – Free: DAE, KMZ, 3DS, DEM, DDF / Pro: Also DWG, DXF (STL via plugin, untried)
- Direct to STL – Nothing native (Plugin, untried)
- 2D Rasters: JPEG, TIFF, PNG
- 2D Vectors: Pro Only PDF, EPS, EPIX
- 3D Vectors: Free KMZ, DAE / Pro: Also 3DS, DWG, DXF, FBX, OBJ, VRML, XSI
- Adjust scale on output – No, unitls pre-indicated
- Direct to Printing Service – No


