This is Part 4 of creating the BeeMail project. Previously I got the Galileo up and running, designed the Bees themselves and built the motor circuits. See the Table of Contents for this series at the bottom of the post.
“All” that was left was to rework the code in the example project to suit my own purposes. Sadly copying and pasting the code as written caused all. sorts. of. error. messages. None of which I understood yet. Since the project has many intermeshed systems, most of which were new to me, Jim Lindblom’s work became a todo list / starting guide. Troubleshooting is all about isolating variables.
My ToDo list looked something like this:
- Is the WiFi Working?
- Is the WiFi hardware recognized?
- Is the Wifi Connected to the network?
- Can the Galileo get out to the internet?
- Can I see the SD card?
- Does the SD card initialize?
- Can the Arduino sketch create files?
- Can the Arduino sketch add content to files?
- Can the Arduino sketch read files?
- Can the Arduino delete files?
- Does the Python Work?
- Does Python run at all?
- Can the shell see the internet / is my mail server available to it?
- Does my Python script work on the Galileo?
- What does the output look like of the Python script and where is it putting it?
- Is the sketch calling the Python script successfully?
- How is the Arduino sketch interpreting the output file?
- Add in the bees.
The first to sections are covered in this post with a lot of long code includes, so I’m putting them after a break.
WiFi
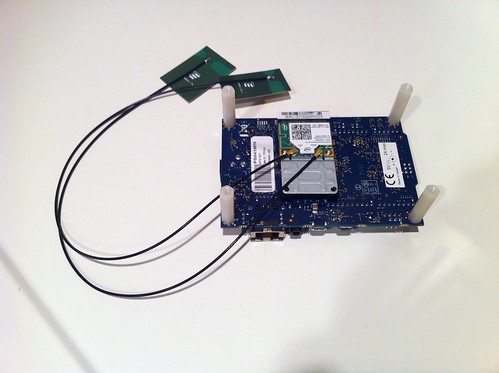
The way to use WiFi on the Intel Galileo is NOT the WiFi shield. On the bottom of the Intel Galileo is a Mini PCI slot which should be used instead. PCI stands for Peripheral Component Interconnect. PCI cards are a standardized way to extend a computer’s hardware functionality. Mini just means PCI’s designed for small computers. There are actually 3 sizes of Mini PCI: traditional, full height and half-height. The Galileo has a full height slot which means the half-height WiFi cards will need an adapter, but those are easy to find. While it is possible to extend Intel Galileo projects relatively cheaply with the many different types of PCI cards out there, keep in mind the specification is not opensource. However, PCI cards remain a viable option especially because not all Arduino shields are compatible with the Galileo board. Intel has posted a list of compatible shields that will hopefully stay maintained.
Shopping List
- A wifi card like Intel Centrino® Advanced-N 6205 or the N135 will work with the firmware of of the box but Sergey Kiselev shows how to update firmware for others like the Intel Centrino® Advanced-N 6235 802.11n. There is more information in the forums.
- An adapter so the half height card will fit in the full PCI slot
- Antennae
- Stand-offs and Screws so you aren’t scrapping the card against the ground since the mini-PCI socket lives on the bottom of the board.
Using the WiFi Library
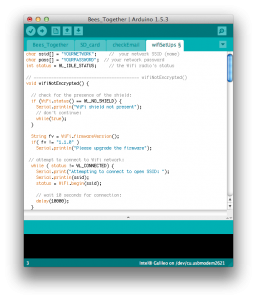
The example code from the Arduino WiFi library functioned on first compile, a completely pleasant experience that worked as expected with both an open network and a WPA secured network connection. I broke both of those example cases out into an file that I could use to add WiFi to future projects by dropping it into the same folder as my Arduino sketch.
WiFi Library Full Test Sketch
This script is for testing WiFi functionality completely as a stand alone sketch. It prints out everything to know about the card and its local connection as well as makes a test call to a plain text page on the Arduino website. If that page ever goes down there is a secondary test funtion that connects to google.com and returns the search results page for “Arduino.”
SD Card
Fixing the SD card errors was not actually what I did after confirming the WiFi worked. I troubleshot the Python, actually, to ascertain whether I was getting data to work with at all. A giant topic in and of itself, that process will be getting its own post. Fixing the Python didn’t make the code work, however. So I turned my attention to the SD Card behavior.
Fix the ability to load the SD library on MacOS.
Sadly there is a flaw in the MacOS Intel Galileo developed Arduino IDE. The IDE can’t find some of Libraries even though they are installed. I’m not entirely clear on what causes the Yocto / gcc snafu mentioned, but this article on Yocto and the Intel Galileo from linux.com looks like where I’ll start reading to understand the bug better. In the mean time, to fix it, open Terminal, navigate to the Java folder, add the sym link.
cd /Applications/ArduiG.app/Contents/Resources/Java
ln -s . hardware/tools/x86/i586-poky-linux-uclibc/usr/include/c++/4.2.1
Even after fixing the embed libraries problem, the in the Arduino Intel Galileo IDE v1.5.3 the SD library include statement does not highlight the keywords.
Ignore that for now. The library does compile and the code will run.
Break down SD functionality into smaller chunks, get stymied at Step Two
A worse consequence of the symlink workaround is that the SD Card Library example files do not show up in the examples folder. They can be found in the SD Card Reference section on the Arduino website.
As per my ToDo list, I used the example files to try answering the following questions in order:
- Does the SD card initialize?
- Can the Arduino sketch create files?
- Can the Arduino sketch add content to files?
- Can the Arduino sketch read files?
- Can the Arduino delete files?
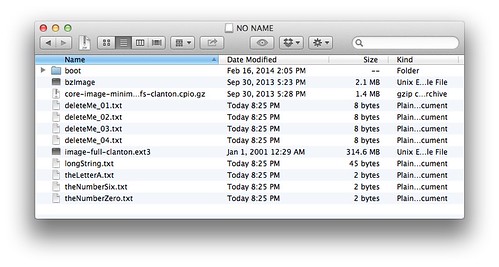
The card initialization code worked just fine, but there was a barrier right on Step 2 that the SparkFun tutorial code neatly avoids with system() call. A bug, not in the Intel Galileo SD library but in the underlying C fopen command, causes any attempt to create a file via Arduino commands to fail. Then attempting to write data to a nonexistent file causes the Arduino process to crash, leading to reboot. If the serial window is open at the time a “**B0100000063f694” message will appear. In my own testing I skipped dealing with file creation troubles by establishing a serial connection via a dongle to the Linux console and manually creating files. That I will cover more in the next post. Going through that step taught me that test files can also be created on a computer and dropped into the SD card’s home directory.
Other than creating files, the other need functions needed work just like the examples.
SD Library Full Test Sketch
I did locate a workaround for creating files which I’ve incorporated into a sketch that others can use for testing.
Keep in mind that the SD library and system commands are required to be C Strings or (lower case s string in Arduino documentation) not the flexible more java-like String Object, String(), that Arduino has also implemented. Much of the crazy in the code below is dealing with translations between the two and creating useful error messages.
In this series
- Part 1
- Overview
- Part 2
- From Zero to Blink.
- Creating an SD card image and getting a sketch to persist on the Galileo
- UPDATE: Blink on an external LED
- Part 3
- Creating the bees and getting them to work on an Arduino UNO
- Part 4 (This Post)
- Setting up Wifi (very easy, library examples worked immediately)
- Getting the SD card read & write to work (a missing libraries/symlink problem)
- Part 5
- Serial Communication to the Linux Core
- Troubleshooting Python on the Galileo
- Part 6
- Revising the example String to Int code (lack of Null Termination problems)
- Moving the motors over to the Galileo


Pingback: carlynorama | Intel Galileo and Bee Mail Part 6: c string to int on an Arduino
Pingback: carlynorama | Intel Galileo and Bee Mail Part 5: Troubleshooting Python in the Linux Shell
Pingback: carlynorama | Intel Galileo and Bee Mail Part 3: The Object
Pingback: carlynorama | The Intel Galileo Board and Bee Mail Part 1: Overview