carlynorama

the blog

Intel Galileo and Bee Mail Part 6: c string to int on an Arduino

by Carlyn Maw on March 31, 2014, no comments

NEW! There will be a Part 7. I’m splitting the wrap-up off of this post. The last few posts have been very unphotogenic and I have one last unphotogenic step to get through before the step with more to see. Instead of burying the pretty, I’ll give the project glamor shots their own day.

This installment will only cover changes made to the getEmailCount() function needed to finally read the file I could now make on the SD card.

Strings to Ints

Sadly, even once a file with a number in lived it on my SD card, the code from the sparkfun Intel Galileo tutorial still wasn’t working for me. I changed a whole bunch of things before rechecking it, so I still don’t know what fixed it for sure. Bad troubleshooting hygiene, I’ll admit.  A better me would go back and recreate the error, but I don’t have time.

When I ran the code I was seeing a null value in the int that was supposed to be holding the quantity of emails found in the inbox. That int derives its value from each of the ASCII characters in the text file on the SD card being passed into an array. Some processing then needs to happen on those characters and/or the array to finish the transformation of a String into an int.

If that paragraph made no sense, the following links are a place to start. I picked them because they all discuss serial communication. During serial communication information is passed between computers and the protocol has to be really clear about what format the data moves around in.  This makes the topic a good one introduction to thinking about swapping data between two programs running on the same machine as well.

To be clear, Jim Lindblom has a clever approach where he converts each ASCII digit into its int value by subtracting the ASCII value for 0 (48) from each byte read from the txt file (line 118).  He then implements a for loop to step through the array those int values had been placed in, multiplying each value by the appropriate power of ten so their sum would equal the correct number of emails (line 125, 126).  This demonstrates a valid and very Arduino community friendly approach because it requires no functions outside of the Arduino reference guide.

Seriously cranky at this point, I chose the less friendly but simpler to me path of loading the text digits into a char array, adding a NULL termination to it and then using the c function atoi() in lieu of the for loops.  Keep in mind, the word “string” in C documentation usually refers to a null-terminated char array not an analog of the Arduino String object.


//detivative of code posted here: https://www.sparkfun.com/news/1360
//discussion of project here: http://blog.carlynorama.com/tag/intelgalileo/
//RELEVANT CHANGES FROM OC COMMENTED IN ALL CAPS
int getEmailCount()
{
//SAME VARIABLES
int digits = 0;
char temp[10];
int emailCnt = 0;
// Send a system call to run our python script and route the
// output of the script to a file.
//ADDED ERROR MESSAGE LOG
//MADE THE FILE I WAS WRITING TO A .TXT FILE
//ADDED ERROR MESAGES LOG
system("python /media/realroot/pyMailCheck.py > /media/realroot/emails.txt 2>pyMailErrors.log");
// Check to see if the file exists:
//ADDED IF FILE EXISTS CHECK
if (SD.exists("emails.txt")) {
//Serial.println("emails exists.");
File emailsFile = SD.open("emails.txt"); // open emails for reading
if (emailsFile) {
while ((emailsFile.available()) && (emailsFile.peek() != '\n')) {
//digits++ is acting like i++, it will go up every time. Assumes no bigger than 10 digit number
//digits is incremented AFTER it is used.
temp[digits++] = emailsFile.read();
}
//digits now contains the index number of the next empty place
//THIS IS WHERE I ADDED THE NULL TERMINATION
temp[digits] = NULL;
//Serial.print("digits: ");
//Serial.println(digits);
//Serial.print("temp: ");
//Serial.println(temp);
//REPLACE THE FOR LOOPING WITH RUNNING atoi() ON THE CHAR ARRAY.
//THE FOR LOOPS ARE FRIENDLIER B/C atoi() IS NOT IN THE ARDUINO DOCS
emailCnt = atoi(temp);
emailsFile.close();
}
// if the file isn't open, pop up an error:
else {
//TELL ME ABOUT THE PROBLEMS
Serial.println("error with emailsFile.txt");
}
}
else {
//ALERT THAT SOMETHING WENT WRONG WITH THE PYTHON
Serial.println("emails doesn't exist.");
}
return emailCnt;
}

Celebrate Good Times

This function worked!!! Happy Dance! Ready to move the shield over from the Uno to the Intel Galileo! Yay!

In this series

  • Part 1
    • Overview
  • Part 2
    • From Zero to Blink.
    • Creating an SD card image and getting a sketch to persist on the Galileo
    • UPDATE: Blink on an external LED
  • Part 3
    • Creating the bees and getting them to work on an Arduino UNO
  • Part 4
    • Setting up Wifi (very easy, library examples worked immediately)
    • Getting the SD card read & write to work (a missing libraries/symlink problem)
  • Part 5
    • Serial Communication to the Linux Core
    • Troubleshooting Python on the Galileo
  • Part 6 (this post)
    • Revising the String to Int code
  • Part 7
    • Motors moved to Intel Galileo
    • Conclusions
    • Next Steps

Big Thumbs Up on the Mike Kelley Exhibit @ MOCA

by Carlyn Maw on March 30, 2014, no comments

Mike Kelley, 03.31.14 – 07.28.14, Geffen Contemporary

More from last year’s memorial

New gig teaching at PCC or “Where’s Part 6, Carlyn?”

by Carlyn Maw on March 25, 2014, no comments

I am excited to announce a last minute gig teaching the second half of an electronics class at Pasadena City College. My first impression of the students is wonderful. In our first class together, they asked for more homework. More! Homework! I can do that.

We have a tumblr that is coming together on the fly: http://pcceltn130.tumblr.com/

I’m taking a stab at a flipped classroom with Standards Based Grading, since honestly it seems the fairest under the circumstances.  As a result I’m spending a lot of time watching youtube videos to find ones that fit the curriculum. The long term goal is to recruit future students to help make more tailored videos. Also… the one standards spreadsheet to rule them all is taking up a lot of cycles.  The link will allow anyone to comment. Google sheets does not have spell check, please forgive.

I have not forgotten about the Intel Galileo Board Part 6. I’m behind the curve now on class prep, so that blog post has slipped priority for another week.

Intel Galileo and Bee Mail Part 5: Troubleshooting Python in the Linux Shell

by Carlyn Maw on March 13, 2014, no comments

This is part 5 in the series of my getting to know the Intel Galileo Board.  I made a project that uses pager motor based bees which buzz louder based on how much email is in my inbox. This is a derivative of the  SparkFun Enginursday project that uses an LED display to show an unread email count.

This section chronicles the work done on Linux core itself.   The Galileo has an x86 processor,  the Quark X1000 SoC, a 32-bit, single core, single threaded, Pentium ISA-compatible, max clock rate 400MHz CPU.  Other folks have played around with installing other flavors of Linux, but I am using the official Image. The ability to use a more robust processor while still in the Arduino ecosystem is one of the major selling point of the Intel Galileo. This week is mostly piddling around in the Linux file system. The next installment demonstrates how to harness the power from an Arduino sketch.

Before You Start

The following post assumes some knowledge of *nix systems and elementary Python. Those with zero Linux knowledge, zero Python knowledge and zero Arduino knowledge might want to pick one to get comfortable with first.  I’ve presumed Arduino knowledge thus far, and will assume some comprehension of the other two.  I recommend the following to skill up:

Add these files to the SD card

Two files, the SparkFun mail checking python script and a test script that always returns the number 18, will aid in the trouble shooting. Put them on the SD card before getting started to save time.

Before placing the mail checking script on the SD card:

  • swap in appropriate email credentials for the dummy text
  • check that script successfully negotiates the mail connection and returns the correct value from a computer
  • place the python file with the credentials on the SD card of the Intel Galileo board.

Options for Talking to the Linux Kernel

Given that there is no way to attach a keyboard, mouse or monitor to the Galileo board out of the box, another root to see inside the Intel Galileo’s brain has to be found. The cracks in the side of the mountain are:

I only have direct experience of the first two.

Use the special RS232 to minijack serial cable

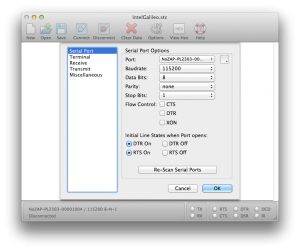
CoolTerm Settings

CoolTerm Settings

Having the appropriate serial cables and a terminal emulator is the most bullet proof method of talking to the Galileo. It does not require the Arduino emulator to be running a specific sketch or even for that feature to be running at all.

For software, on the Mac I use either Cool Term or  the screen utility.  The hardware I needed:

I’ve uploaded my terminal settings. The port name will need to be changed depending on what USB to serial adapter driver you have installed.

After making the connection, if the Galileo is already booted, nothing will happen in the terminal window.  Hit return and a login prompt will show up. The login name is root. There is no password.

For future use, once the connection is made, even without login, all of the debugging messages during start up and sketch upload come streaming out this line.  Access to those messages alone justifies spending the money on an adapter.

With WiFi

Run WifiChecker. The code has the Arduino tell you its IP address via the Serial port.  Open a Terminal program and establish a connection to the Intel Galileo Board by typing:

ssh root@INSERT_IP_NUMBER_HERE

If you have SSH‘ed into something at that was assigned that address on your network before a RSA key warning will appear. The best course of action is to delete that IP address’s entry in your known_hosts file.

First things first

Once in, you are free to move about the system.  I suggest changing the password, especially if leaving your Intel Galileo connected to a network.

Next look at the directory structure, not with ls (show me the files) but df (show me attached hardware).

#####CHECKING FILE SYSTEM
#display free disk space (df)
df -h
#change directories to the alias for the Arduino storage
cd /media/realroot
#now that you are actually somewhere with files the
#ls command will work and show the test files from
#working with the SD library if there are any.
ls -l
#####END CHECKING FILE SYSTEM

Congratulations, you’ve hacked your personal Gibson.

Check The Internet

The Python script won’t work if it can’t see the internet and the mail server. Make sure WifiChecker or some other WiFi enabling Arduino sketch is loaded. Then try some of the commands below.

#####CHECKING INTERNET
#ping googles DNS Server to see if internet is working
ping 8.8.8.8 #googles DNS Server
^C
#get a web page, if ping works, not all that necessary
telnet google.com 80
GET / HTTP/1.0
#<return>
#<return>
#check that the mail server responds
ping YOUR.MAIL.SERVER.COM
^C
#is SSL possible on the mail server SSL port
telnet YOUR.MAIL.SERVER.COM 993 #IMAP SSL

#an alternate way to get IP address if didn't
#use WiFiChecker
ifconfig

#####END CHECKING INTERNET

Check Python

Python 2.7.3 comes with the Galileo SD image.  Checking the basic functions takes just a few commands.

#####CHECKING PYTHON
# get the version
python -V
# launch python interpreter
python
#run the len() command as a simple test
len("I should return 18")
#leave python interpreter ^D will also work
exit()
#test the ability to run the test script
#will only work if you've actually copied
#the test scrip to the SD card.
python test_return18.py
#####END CHECKING PYTHON

Troubleshooting the pyMailCheck.py Script

The fully updated Python script should be on the SD card ready to run.  Hopefully a simple call while inside the /media/realroot directory will run beautifully for you and no more will need to be done.

python pyMailCheck.py

That isn’t what happened for me.  Running the script resulted in a fatal socket error.

File "pyMailCheck.py", line 5, in &lt;module&gt; obj = imaplib.IMAP4_SSL('mail.MYSERVER.com', '993') # Connect to an IMAP4 sever over SSL, port 993</pre>
File "/usr/lib/python2.7/imaplib.py", line 1148, in __init__ IMAP4.__init__(self, host, port)
File "/usr/lib/python2.7/imaplib.py", line 163, in __init__ self.open(host, port)
File "/usr/lib/python2.7/imaplib.py", line 1160, in open self.sslobj = ssl.wrap_socket(self.sock, self.keyfile, self.certfile)
File "/usr/lib/python2.7/ssl.py", line 381, in wrap_socket ciphers=ciphers)
File "/usr/lib/python2.7/ssl.py", line 143, in __init__ self.do_handshake()
File "/usr/lib/python2.7/ssl.py", line 305, in do_handshake self._sslobj.do_handshake() socket.error: [Errno 104]
Connection reset by peer

The error implicated the second line of code, the fifth line of the file. The script had worked perfectly for me from my computer.  My approach was to launch the Python interpreter on the Galileo board and test it line by line.  Indeed, line two was the problem. My code uses a custom mail domain via Dreamhost. The SparkFun code was tested with a gmail server. Turns out this code works perfectly from the Galileo when the mail server is a gmail server, but not my mail server.  Doh.

I suspect the suggestions on the Dreamhost wiki page about Certificate Domain Mismatch Error hold they key, but I’m not 100% confident. Since I’m using a disposable email address for a temporary project, my workaround in the short term is to do the VERY BAD NEVER REALLY DO THIS sending of the password in the clear which allows the Galileo to connect to my webserver just fine.

obj = imaplib.IMAP4('mail.YOURSERVER.com') # Connect to an IMAP4 server. Password CLEAR TEXT

Home stretch…

More sadness, for me the Arduino code STILL didn’t properly read the numbers from a file after getting the Python script sorted out and confirmed functional.

The next task required troubleshooting code written to read the numbers in from a file.  And that will have to wait until next week…. but so so so close…

In this series

  • Part 1
    • Overview
  • Part 2
    • From Zero to Blink.
    • Creating an SD card image and getting a sketch to persist on the Galileo
    • UPDATE: Blink on an external LED
  • Part 3
    • Creating the bees and getting them to work on an Arduino UNO
  • Part 4
    • Setting up Wifi (very easy, library examples worked immediately)
    • Getting the SD card read & write to work (a missing libraries/symlink problem)
  • Part 5 (this post)
    • Serial Communication to the Linux Core
    • Troubleshooting Python on the Galileo
  • Part 6
    • Revising the example String to Int code (lack of Null Termination problems)
    • Moving the motors over to the Galileo

Data Visualization – A Survey of Resources

by Carlyn Maw on March 6, 2014, no comments

This is a collection of resources about Data Visualization for Learn To Code With Us March 2014.

Books (Overviews)

Videos

Online Tools (non programmer friendly)

These are tools that let the user create their own visualizations. They are also good sources for inspiration and DATA.

  • Visualizing.org : “A community of creative people making sense of complex issues through data and design”
  • Many Eyes :  “This site is set up to allow the entire internet community to upload data, visualize it, and talk about their discoveries with other people. “
  • Gap Minder : “Fighting devastating ignorance with fact-based worldviews everyone can understand.”
  • plot.ly : “Plotly is a collaborative data analysis and graphing tool.”
  • An article listing 33 tools 

Software Development Tools

Examples

Intel Galileo and Bee Mail Part 4: Working with Libraries

by Carlyn Maw on March 3, 2014, 4 comments

This is Part 4 of creating the BeeMail project. Previously I got the Galileo up and running, designed the Bees themselves and built the motor circuits. See the Table of Contents for this series at the bottom of the post.

“All” that was left was to rework the code in the example project to suit my own purposes. Sadly copying and pasting the code as written caused all. sorts. of. error. messages. None of which I understood yet.  Since the project has many intermeshed systems, most of which were new to me, Jim Lindblom’s work became a todo list / starting guide. Troubleshooting is all about isolating variables.

My ToDo list looked something like this:

  • Is the WiFi Working?
    • Is the WiFi hardware recognized?
    • Is the Wifi Connected to the network?
    • Can the Galileo get out to the internet?
  • Can I see the SD card?
    • Does the SD card initialize?
    • Can the Arduino sketch create files?
    • Can the Arduino sketch add content to files?
    • Can the Arduino sketch read files?
    • Can the Arduino delete files?
  • Does the Python Work?
    • Does Python run at all?
    • Can the shell see the internet / is my mail server available to it?
    • Does my Python script work on the Galileo?
    • What does the output look like of the Python script and where is it putting it?
    • Is the sketch calling the Python script successfully?
    • How is the Arduino sketch interpreting the output file?
  • Add in the bees.

The first to sections are covered in this post with a lot of long code includes, so I’m putting them after a break.

more →

SyntaxHighlighting Evolved WordPress Plugin and a Custom Arduino Brush

by Carlyn Maw on February 28, 2014, one comment

Screen shot of a render of example code using SyntaxHighlighter and my Plugin

Example code using SyntaxHighlighter and my Plugin

I’ve been using github gists fairly heavily because of not wanting to bother to with code highlighting plugins since moving to a self hosted WordPress blog.  I finally got sick of that tonight while watching my site be suuupppperrr slow loading because of a call to gist.github.com. This right after writing a tiny little gist that no one will care about outside of the post for the next section of the Intel Galileo write up.

The consensus seems to be that SyntaxHighlighting Evolved is the go-to plugin, although Crayon looks pretty great. Since Arduino language recognition is not included in the default package, I wrote my own plugin to add Arduino highlighting to SytaxHighlighting Evolved and put THAT on github. This seems like an easy way into plugin development. I’ve submitted the plugin to WordPress.org and will update this post if it is accepted.

Things to look into:

  • One of the tutorials has heavier and lighter versions of its formatting… could that be a setting?
  • Can the colors be updated via a setting page?

Places I learned from:

Intel Galileo and Bee Mail Part 3: The Object

by Carlyn Maw on February 28, 2014, 5 comments

Bee mounted with pager motor on spring

Bee mounted with pager motor on spring

Most of the other parts of this series will be about the Galileo Board and the software driving the project. This installment is about the object itself, which to me is the most important.

The Bees

The visible parts all come from my work as a Tech Disrupter at the Intel Experience store.

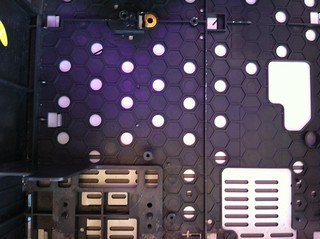
Honey comb pattern from the bottom of a Mitsubishi VCR

Honey comb pattern from the bottom of a Mitsubishi VCR

The idea of doing something bee themed actually came in mid December with the honeycombed bottom of a Mitsubishi VCR. The honeycombing provides strength to the plastic so the manufacturer can use less material.

underside of bee

Spring and washer mounting system for the bees

I began collecting springs as well. Printers were the best source. The vibration motors came from BrushBots left behind from the races. Although I did collect some from mobile phones. A washer below the spring provides a large stable base. The different types of springs used means each bee has its own personality.

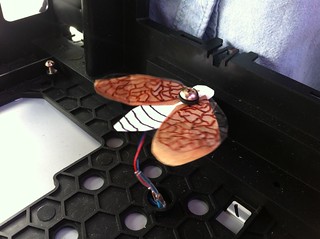
Bee in situ with the final wing prototype of plastic and craft paper

Bee with combination wings

The bodies are index card. The best wing configuration turned out to be a combination of brown craft paper and a thin plastic from some discarded packaging. The plastic is about the same weight as overhead transparency sheets and the veining was drawn with sharpies.

Telephone exchange wire soldered onto headers for use with breadboard

Telephone exchange wire soldered onto headers for use with breadboard

Each bee motor has salvaged telephone exchange wire extensions. Each joint is protected with clear heatshrink I bought from Electronic City‘s closing sale. Some of the wire was stranded which necessitated soldering on male header pins for breadboarding.

The Circuit

With the UNO I would have been tempted to drive the pager motors directly, but with the Galileo’s increased delicacy I decided to seek out the correct way of do things. The most thorough but clear explanation of how to hook up a pager motor the right way came from Precision Microdrives. Instead of surface mount mosfets I used PN2222 transistors. Transistors do not require pull down resistors, but they do require current limiting resistors.

Schematic of motor being driven by a microcontroller pin

Schematic of motor being driven by a microcontroller pin, screen shot of layout done on circuits.io because I wanted to test that system.

This is what that circuit looks when multiplied and put into an Arduino protoshield. This is an old shield, but both Adafruit and SparkFun sell good ones.

The circuit (transistors driving 3 pager motors separately)

The circuit (transistors driving 3 pager motors separately)

Using a shield help ease the transfer from the UNO used for preliminary testing and the Galileo. Switching from the UNO lead to the discovery that on the Galileo the I/O pins are pulled up (5V or 3.3V depending) between the Galileo embedded Linux start-up and the Arduino sketch startup. The Bees are angry when woken.

This is ideal for projects using negative logic, but it is kind of a disaster for motor projects using positive logic. I am following this thread about GPIO pins starting high to see if there will be a way to choose.

The Code

This code just tests the bee behavior based on the input of a potentiometer. I’ve also been running into a problem where if the bees have just been left alone for awhile (especially off) the program locks up. When queried on the serial port the identity of the board has switched ports. I have not determined what is happening with that yet, either.

//------------------------------------------------------------ START LICENSE

/*The MIT License (MIT)

Copyright (c) 2014 Carlyn Maw

Permission is hereby granted, free of charge, to any person obtaining a copy
of this software and associated documentation files (the "Software"), to deal
in the Software without restriction, including without limitation the rights
to use, copy, modify, merge, publish, distribute, sublicense, and/or sell
copies of the Software, and to permit persons to whom the Software is
furnished to do so, subject to the following conditions:

The above copyright notice and this permission notice shall be included in
all copies or substantial portions of the Software.

THE SOFTWARE IS PROVIDED "AS IS", WITHOUT WARRANTY OF ANY KIND, EXPRESS OR
IMPLIED, INCLUDING BUT NOT LIMITED TO THE WARRANTIES OF MERCHANTABILITY,
FITNESS FOR A PARTICULAR PURPOSE AND NONINFRINGEMENT. IN NO EVENT SHALL THE
AUTHORS OR COPYRIGHT HOLDERS BE LIABLE FOR ANY CLAIM, DAMAGES OR OTHER
LIABILITY, WHETHER IN AN ACTION OF CONTRACT, TORT OR OTHERWISE, ARISING FROM,
OUT OF OR IN CONNECTION WITH THE SOFTWARE OR THE USE OR OTHER DEALINGS IN
THE SOFTWARE.
*/

// ---------------------------------------------------------------- END LICENSE

//This code is testing code for the circut to make sure all of the
//physical Arduino I/O is working. It checks a potentiometer or other
//sensors on the AO PIN and equates it to the future number of mails
//in the inbox.
//On each pin 9, 10 and 11 are 220 Ohm resistors leading to the bases of
//PN2222A transistors. The collector is attached to the motor and the
//emitter to ground.

//------------------------------------------------- OUTPUTS AND THEIR VARIABLES
//the total number of bees bing controlled
const int beeTotalNumber = 3;

int beePins[beeTotalNumber] = {9, 10, 11 };

//INPUTS AND THEIR VARIABLES
int howManyNewEmails = 0;

//--------------------------------------------------------  GLOBAL BEE SETTINGS

//the number of emails the bees hit maximum freakout.
//ideally it should be divisible by the number of
//beeActivityLevels
int maxBeeVar = 1023;

//how many different states the Bees can be in
const int beeActivityLevels = 16;

//The area that dictates the 16 BeeActivityLevels.
int b[beeActivityLevels][beeTotalNumber] =
{
  { 0, 0, 0 },
  { 0, 0, 50 },
  { 0, 50, 50 },
  { 50, 50, 50 },
  { 50, 50, 100 },
  { 50, 100, 100 },
  { 100, 100, 100 },
  { 100, 100, 150 },
  { 100, 150, 150 },
  { 150, 150, 150 },
  { 150, 150, 200 },
  { 150, 200, 200 },
  { 200, 200, 200 },
  { 200, 200, 250 },
  { 200, 250, 250 },
  { 255, 255, 255 },
};

//---------------------------------------------------------------------- SETUP
void setup() {
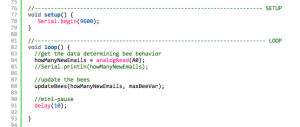
   Serial.begin(9600);
}

//----------------------------------------------------------------------- LOOP
void loop() {
  //get the data determining bee behavior
  howManyNewEmails = analogRead(A0);
  //Serial.println(howManyNewEmails);

  //update the bees
  updateBees(howManyNewEmails, maxBeeVar);

  //mini-pause
  delay(10);

}

//---------------------------------------------------------------- updateBees()
void updateBees(int v, int maxVal) {
  //ignore any values of V above maximum freakout level
  // v = min(v, maxVal); does not work in Intel Galileo MacOS IDE

  if (v > maxVal) {
    v = maxVal;
  }

  //map the newly constrained V to the beeActivityLevel array
  //the top value is 1 less than the number than the array size
  //because the an array starts with the index number 0
  int mappedV = map(v, 0, maxVal, 0, beeActivityLevels-1);
  //Serial.println(mappedV);

  //for each bee, get the value it supposed to be and set it there
  for (int i=0; i <= beeTotalNumber-1; i++){
    //Serial.println(b[mappedV][i]);
    analogWrite(beePins[i], b[mappedV][i]);
  }

}

Related Posts

  • Part 1
    • This overview
  • Part 2
    • From Zero to Blink.
    • Creating an SD card image and getting a sketch to persist on the Galileo
    • UPDATE: Blink on an external LED
  • Part 3 (This Post)
    • Creating the bees and getting them to work on an Arduino UNO
  • Part 4
    • Setting up Wifi (very easy, library examples worked immediately)
    • Getting the SD card read & write to work (a missing libraries/symlink problem)
  • Part 5
    • Serial Communication to the Linux Core
    • Troubleshooting Python on the Galileo
  • Part 6
    • Revising the example String to Int code (lack of Null Termination problems)
    • Moving the motors over to the Galileo

Field Trip to Michael Levine

by Carlyn Maw on February 27, 2014, no comments

Upholstery side of Michael Levine

View when just walking in to the upholstery side of Michael Levine

Yesterday I went to Michael Levine for the first time with my friend Cecily Keim.  Turns out it’s a compound, two store fronts right across the street from each other. One has upholstery fabrics, the other more clothing and notions oriented.  Walking through both buildings with Cecily served as an excellent survey class on fabrics.

Textures together

Amazing colors with still enough comforting gray for me.


Cork Fabric

Real cork!

In the upholstery section the employees have a knack for laying out the bolts in thought provoking combinations. I typically gravitate towards solids so I spent a lot of yesterday stupefied.

Although they have a section where fabric can be purchased by weight and a calendar of specials, I’ve read that Michael Levine’s is not the cheapest place to buy fabric in the 100 block megalopolis of textures that is the fashion district. For the fabric savvy who know what they want and how much a yard should cost, I don’t doubt it. That certainly doesn’t describe me, however, so I was glad for the edited introduction.

While Cecily was a font of useful information, my favorite tip was to not super stress what a fabric was theoretically best for and if I like one and can afford the experiment just try and learn from the experience.

I managed to get out of the area without buying anything, miracles of miracles. Cecily is kindly determined not to let that happen again and sent me home with three books she recommends to rustle up a concrete practice project idea.

 One-yard Wonders by by Patricia Hoskins and Rebecca Yaker.

 Simple Sewing by Lotta Jansdotter.

 Teach Yourself Visually: Sewing by Debbie Colgrove (same publisher as Cecily’s book.)

The Intel Galileo Board and Bee Mail Part 2: Blink

by Carlyn Maw on February 16, 2014, 6 comments

External LED hooked up to Galileo Board

The Intel Galileo Board hooked up to an external LED on Pin 8

This section of the write up covers:

  • Intel Galileo Board out of the box to first sketch
  • Retaining a sketch through reboot
  • Wiring up an external LED

I will be assuming familiarity with making Arduino projects. The goal is to point out potential gotcha’s for Arduino/MacOS users and to have record for myself in the future.

The Galileo board is susceptible to static so no shuffling across carpets. Do keep the board in its anti-static bag if when not in use.

Hello World: Blinking the onboard LED

Galileo blinking the LED on Pin 13

Galileo blinking the LED on Pin 13

If you are on a Mac read the getting started tutorial by Stefano Guglielmetti on the Arduino blog.  It is simple and covers all the potential pitfalls for those used to working with an Arduino in a particular way. The SparkFun getting started is more thorough. I wish I had read them both before I jumped in. The knowledge they contain would have saved me heaps of time. Here are some steps of my own.

  • Download the software from Intel’s Galileo site. It is also called “Arduino.” Do rename it and move it to the Applications folder, but keep the name of the development application short (less than 8 character) without spaces (i.e. “ArduiG” not “Arduino Galileo”) Open the application to make sure it works and then close it. Despite the rename the menu bar will still display the word Arduino when the application is open.
    • When I download the software from Intel, to prevent conflicts with existing Arduino software, I changed the name of the development environment to “Arduino Galileo.” It opened just fine. However, when updating the firmware the processes failed with the message “<< Target Firmware Version Query Failed >>” Searching the for that message on the Galileo forum got me the answer about the file name. There are more tips on how to name files from Apple.
    • The sparkfun tutorial has directions for Windows and Linux as well.  If you are not on a Mac you will also need to install drivers.
  • Plug in the Galileo into the provided external supply for 10 seconds or so. Everyone Says This in Bold Letters.
    • The couple of times I’ve forgotten for a second it hasn’t destroyed my board, but it’s a risk. Why is this a big deal? The Galileo needs more than the 500 mA provided by the USB 2.0 spec to run and depending on your USB port it could lose power mid boot-up sequence, ruining the board? That is just a guess. There may be a different hardware reason as well. I have not examined the schematic.
    • The external power supply must be a regulated switching 5V supply. The Galileo works natively at 3V so it’s power circuits really can’t handle that 12V wall wart Arduino motor or LED strip tutorials call for. Further reading on power supplies: Adafruit, SparkFun and Apogee Kits
  • Plug in the USB cable (the one next to the ethernet port), count to 10. Then open your Intel Galileo Arduino IDE, whatever you called it.
  • Look for the board to appear in the “Tools > Serial Port” On a Mac, the correct port to use for the Galileo is on the /dev/cuXXX port not the /dev/ttyXXX port. I’ve forgotten that at least twice now and been confused by a “board not available error” when my board was clearly plugged in and turned on.  The USB driver chip on Galileo is different than the one on the my ol’ Duemilanove and it just wants different things.
    • The tty vs cu conversation is deep in the history of how these technologies developed and I’ve found no answers that weren’t jargon laden. The gist is that conventionally cu is for the master server to establish connections on and tty is for dependant devices to establish connections on.
    • If you don’t see the board listed, the support site recommends: “Close the Arduino software first, then unplug the USB cable from your computer. Try repeating the process until the port is recognized. Restarting your computer will help you in debugging the issue.”
  • Update the firmware via “Help > Firmware.” Once I got the name problem figured out, this worked smoothly for me except, although I had to reboot the software when finished.
  • Load the blink sketch from Examples > 01.Basics > Blink (No problems)
  • Watch the LED on pin 13 blink (No problems)
  • Change the delay time in the blink sketch, watch again (No problems)

Yay! Blinking LED! At this point the USB cable can be detached from the computer and the Galileo will blink just with it’s power supply connected. But only while the board stays plugged in. As soon as the Galileo powers down it will forget ever having a sketch uploaded.   Booting from an SD Card fixes that problem.

Set up the SD Card

GalileoSDImage
The Galileo board is quite clever. The entire operating system lives all folded up origami style on a tiny little chip and every time the power comes on the code unfurls into more memory, retreating as power fades from the board. Poetic, really. However, that elegance leaves no crannies for an Arduino sketch to hide in. The SD card provides a big container with more leg room for sketches and amenities like Python and WiFi. So with the Galileo get a card that is 1GB to 32 GB and a way to read it.   Once again I will point to the SparkFun tutorial, but the steps run pretty smoothly.

  1. Download the LINUX IMAGE FOR SD for Intel Galileo from the drivers page
  2. Decompress the archive
  3. Put the files on the SD card at the root level
  4. put the SD card in the unpowered Galileo
  5. Plug in Power, Wait for the USB light to come on, The SD card light to start and then stop flickering,
  6. Plug in the USB cable
  7. Reopen the software
  8. Pick the device from “Tools > Serial Port” (the name will have changed, still the /dev/cuXXX port)
  9. Load blink sketch
  10. Quit the software
  11. Unplug USB
  12. Unplug Power
  13. Plug in power, wait again ~20 to 40 seconds, watch blink

For me the biggest hurdle was the 7-zip format of the compressed file.  On a Mac, software like The Unarchiver will work. (Thanks SparkFun!). The day I prepared an SD card for the first time it took me ages to find software that was free for an archive of this size (Springy hit a pay wall) and easily configured for the mac. Whatever search terms I was using weren’t working for me that day. I have access to a Windows machine so I just used that.

Blink an external LED

The next step of course is to blink an external LED. Normally for Arduino 101 I would hook up an LED with the anode towards the microcontroller so setting digitalWrite(myPin, HIGH) would turn on the LED.  The consequences of frying a pin on a Galileo are higher than on an Uno and the Galileo Spec indicates that the board is designed provide a maximum of 10 mA or receive a maximum of 25 mA. As a result, I would suggest using negative logic instead.  Negative logic means that the LED is wired cathode (ground side) to the microcontroller so the microcontroller can sink the power rather than source it.

LED Logic & Wiring Diagram

LED Logic & Wiring Diagram

In the picture below an LED is hooked up to the 5V output of the Galileo board and pin 8. The code is the same example sketch with the variable “led” set to 8. The LED still blinks, just with the timing inverted.  As shipped the Galileo board has a jumper that bumps the power of the I/O pins up to 5V. The Galileo’s microcontroller supplies 3V natively, but the folks at Intel thoughtfully added multiplexers to their board so it would run like the basic Arduino hardware. For now, leave the jumper the way it came and set up the LED with a 220 Ohm or 330 Ohm resistor and watch it blink.

Intel Galileo blinking an external LED

Intel Galileo blinking an external LED

  • Part 1
    • Overview
  • Part 2 – This Post
    • From Zero to Blink.
    • Creating an SD card image and getting a sketch to persist on the Galileo
    • Blink on an external LED
  • Part 3
    • Creating the bees and getting them to work on an Arduino UNO
  • Part 4
    • Setting up Wifi (very easy, library examples worked immediately)
    • Getting the SD card read & write to work (a missing libraries/symlink problem)
  • Part 5
    • Serial Communication to the Linux Core
    • Troubleshooting Python on the Galileo
  • Part 6
    • Revising the example String to Int code (lack of Null Termination problems)
    • Moving the motors over to the Galileo