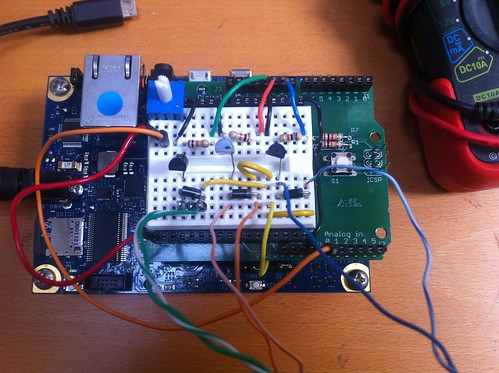
NEW! There will be a Part 7. I’m splitting the wrap-up off of this post. The last few posts have been very unphotogenic and I have one last unphotogenic step to get through before the step with more to see. Instead of burying the pretty, I’ll give the project glamor shots their own day.
This installment will only cover changes made to the getEmailCount() function needed to finally read the file I could now make on the SD card.
Strings to Ints
Sadly, even once a file with a number in lived it on my SD card, the code from the sparkfun Intel Galileo tutorial still wasn’t working for me. I changed a whole bunch of things before rechecking it, so I still don’t know what fixed it for sure. Bad troubleshooting hygiene, I’ll admit. A better me would go back and recreate the error, but I don’t have time.
When I ran the code I was seeing a null value in the int that was supposed to be holding the quantity of emails found in the inbox. That int derives its value from each of the ASCII characters in the text file on the SD card being passed into an array. Some processing then needs to happen on those characters and/or the array to finish the transformation of a String into an int.
If that paragraph made no sense, the following links are a place to start. I picked them because they all discuss serial communication. During serial communication information is passed between computers and the protocol has to be really clear about what format the data moves around in. This makes the topic a good one introduction to thinking about swapping data between two programs running on the same machine as well.
- Arduino’s Serial.print documentation
- NYU ITP’s Intro to Physical Computing Serial Out Lab
- RoboReal Serial Tutorial
To be clear, Jim Lindblom has a clever approach where he converts each ASCII digit into its int value by subtracting the ASCII value for 0 (48) from each byte read from the txt file (line 118). He then implements a for loop to step through the array those int values had been placed in, multiplying each value by the appropriate power of ten so their sum would equal the correct number of emails (line 125, 126). This demonstrates a valid and very Arduino community friendly approach because it requires no functions outside of the Arduino reference guide.
Seriously cranky at this point, I chose the less friendly but simpler to me path of loading the text digits into a char array, adding a NULL termination to it and then using the c function atoi() in lieu of the for loops. Keep in mind, the word “string” in C documentation usually refers to a null-terminated char array not an analog of the Arduino String object.
This file contains bidirectional Unicode text that may be interpreted or compiled differently than what appears below. To review, open the file in an editor that reveals hidden Unicode characters.
Learn more about bidirectional Unicode characters
| //detivative of code posted here: https://www.sparkfun.com/news/1360 | |
| //discussion of project here: http://blog.carlynorama.com/tag/intelgalileo/ | |
| //RELEVANT CHANGES FROM OC COMMENTED IN ALL CAPS | |
| int getEmailCount() | |
| { | |
| //SAME VARIABLES | |
| int digits = 0; | |
| char temp[10]; | |
| int emailCnt = 0; | |
| // Send a system call to run our python script and route the | |
| // output of the script to a file. | |
| //ADDED ERROR MESSAGE LOG | |
| //MADE THE FILE I WAS WRITING TO A .TXT FILE | |
| //ADDED ERROR MESAGES LOG | |
| system("python /media/realroot/pyMailCheck.py > /media/realroot/emails.txt 2>pyMailErrors.log"); | |
| // Check to see if the file exists: | |
| //ADDED IF FILE EXISTS CHECK | |
| if (SD.exists("emails.txt")) { | |
| //Serial.println("emails exists."); | |
| File emailsFile = SD.open("emails.txt"); // open emails for reading | |
| if (emailsFile) { | |
| while ((emailsFile.available()) && (emailsFile.peek() != '\n')) { | |
| //digits++ is acting like i++, it will go up every time. Assumes no bigger than 10 digit number | |
| //digits is incremented AFTER it is used. | |
| temp[digits++] = emailsFile.read(); | |
| } | |
| //digits now contains the index number of the next empty place | |
| //THIS IS WHERE I ADDED THE NULL TERMINATION | |
| temp[digits] = NULL; | |
| //Serial.print("digits: "); | |
| //Serial.println(digits); | |
| //Serial.print("temp: "); | |
| //Serial.println(temp); | |
| //REPLACE THE FOR LOOPING WITH RUNNING atoi() ON THE CHAR ARRAY. | |
| //THE FOR LOOPS ARE FRIENDLIER B/C atoi() IS NOT IN THE ARDUINO DOCS | |
| emailCnt = atoi(temp); | |
| emailsFile.close(); | |
| } | |
| // if the file isn't open, pop up an error: | |
| else { | |
| //TELL ME ABOUT THE PROBLEMS | |
| Serial.println("error with emailsFile.txt"); | |
| } | |
| } | |
| else { | |
| //ALERT THAT SOMETHING WENT WRONG WITH THE PYTHON | |
| Serial.println("emails doesn't exist."); | |
| } | |
| return emailCnt; | |
| } |
Celebrate Good Times
This function worked!!! Happy Dance! Ready to move the shield over from the Uno to the Intel Galileo! Yay!
In this series
- Part 1
- Overview
- Part 2
- From Zero to Blink.
- Creating an SD card image and getting a sketch to persist on the Galileo
- UPDATE: Blink on an external LED
- Part 3
- Creating the bees and getting them to work on an Arduino UNO
- Part 4
- Setting up Wifi (very easy, library examples worked immediately)
- Getting the SD card read & write to work (a missing libraries/symlink problem)
- Part 5
- Serial Communication to the Linux Core
- Troubleshooting Python on the Galileo
- Part 6 (this post)
- Revising the String to Int code
- Part 7
- Motors moved to Intel Galileo
- Conclusions
- Next Steps


